Thursday, November 17, 2005

hanging draw

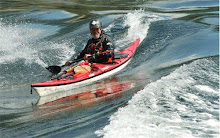
The key to the hanging draw is the placement of the blade at the pivot point of the boat. Usually this point is at the thigh just in front of the hip, although this varies from boat to boat. The way to find this point is to start by placing the blade in at the thigh perfectly neutral (no pitch on the blade so it slices cleanly through the water). Then open the blade slightly ( the leading edge or front slightly outward). If you start to turn (yaw)slide the blade towards the stern.

Wednesday, November 16, 2005

Wind Gauge

Here it Long Beach we keep it fairly simple yet incredibly accurate. I
have a rock on a string hanging outside the window. If the rock is
moving, it is windy, if it is wet then it is raining, if it is warm then
it is sunny and if I can't see it then it is foggy. What else do you need?

Monday, November 14, 2005

Short Tows

I see many people with short tows attached to their decks, usually just some line with a carabiner at each end. Some use them exclusively as a paddle park and others use them with contact tows or while rafting up. It recently dawned on me that without a quick release these could easily become a hazard, so I have taken to removing one of the carabiners and substituting it with a slip hitch to my deck line. The knot I use is a mooring hitch and while it easily releases with one hand, it binds well under pressure.
The following is from scoutXing

Knots - Mooring Hitch

An underhand loop toggled to the standing part with a bight made in the running end

To securely tie off a rope so that it can be quickly untied, especially a small boat to a dock or piling.

A secure knot that is easily tied or untied in wet or dry rope; when properly tied a non closing loop is formed, this allows the hitch to move up or down a piling as the water level changes.

(1) Take a bight around an object. (2) Form an underhand loop in the running part. (3) Place the eye of the underhand loop over the standing part. (4) Pull a bight of the standing part through the eye of the underhand loop. (5) Pull the underhand loop tight around the bight. (6) Place the running part under the eye of the bight that was pulled through the underhand loop. (7) Pull a bight of the running part through the eye of the standing part bight. (8) Pull on the standing part to tighten the standing part bight around the running part bight.

Mooring Hitch

mooring hitch


Tuesday, July 05, 2005

The value of professional instruction

The primary benefit of professional instruction (ie instructor makes his/her living at it), is that to be successful the instructor has to be able to not only introduce the skills, but develop activities that address each individuals learning style. The more you teach skills the better you can become at identifying and correcting mistakes in technique before they become embedded. I have met paddlers with great personal paddling skills that had trouble sharing them because they did not have good teaching skills. Great instructors measure their success by their students success.

Forward Stroke


In regard to the the cadence and blade placement, consider the following. The blade has the most grip on the water when it is vertical and perpendicular to the boat. In a average stoke this distance is only about 18-24". The idea of spearing the fish, ie reaching forward on the catch places the blade less than vertical initially is far less than efficient but is neccessary when the boat is moving rapidly. This is more of a wind up than a catch. So if the most efficient stroke length is only 24" you can actually get more out of it with good torso rotation and straighter arms because as you rotate with straight arms the blade while still vertical and perpendicular moves diagonally turning the 24" of grip to say 30" or more before the slice. The key is a vertical paddle shaft. Cadence follows as the slice out sets up the following stroke on the other side. Try paddling slowly with nearly straight arms and see if this makes sense.

The Forward Stroke

I agree that "torso" rotation is a misnomer, but I think hip rotation might also be misleading. I consider the rotation to start from the feet. With the foot braces positioned correctly the paddler should have the ability to nearly straighten one leg at a time. The straightened leg then forces the hips to rotate and that in turn rotates the lower back. One little simple excercise that demonstrates this clearly is to place paddle behind back with arms over the shaft.Try to paddle. Now try the same thing without contact with the foot braces. Usually a fairly concrete demonstration that needs little explanation.

Wednesday, April 06, 2005

Paddle Float

If it is hard to keep your legs from falling asleep while paddling, try putting your partially inflated paddlefloat under your knees. I strap mine to the seat with 1" webbing and quick release buckle.